Configure Outgoing Replication
Create the Replication job
Navigate to Administration > Storage > Replication and under the Outgoing Replication tab, click Add to create a replicaiton job. If necessary, you may create multiple replication jobs to upload the same recordings to multiple target servers simultaneously.

Fill out the required configuration parameters:
- Name. Provide the descriptive name for the replication job.
- Access scope (visible in multi-tenant version only). Specifies what tenants are replicated to the target server.
- Target server url. The URL (domain or IP-address) or the target server web portal.
- SSL verify. If enabled and a domain name is used for the Target server url, then the sender automatically verifies the target server's SSL certificate (recommended).
- Replication token. A secure replication token created on the target server. See the previous step.
- Parallel upload. A number of parallel upload workers sending data simultaneously. Depending on network latency, an increase of the parallel workers may improve a replication speed due to better bandwidth utilization.
- Upload chunk size. A maximum file chunk per one upload request. Depending on network bandwidth/latency, an increase of this attribute may improve a replication speed.
- Mode. Full or incremental replication mode.
- Full replication mode will upload all call recordings to target server everytime the job is started. It will gracefully skip upload process if the target server contains such recordings already.
- Incremental replication mode remembers which records have been uploaded already to the target server and do not process them on next start. Such mode is useful when job is scheduled for periodic replication (every hour/day etc). It will work a lot faster than the full replication mode because it will skip automatically the previously uploaded recordings.
- Replicate data. Type of data to be replicated (audio files, call metadata, users configuration).
- Remove after replication. The recordings can be deleted automatically after successful replication.

Filtering criteria
Each repelication job supports filtering criteria to limit what call recordings are replicated from the target storage. For example, you may configure replication for specific group of users only.

Action after successful processing
Optionally, the replication process may assign/unassign a category once the recording is replicated. This capability can be used to create a chain of post-processing, like relocate files first, then replicate, then transcribe, etc.

Job advanced settings
Please also check the following advanced settings for the job:
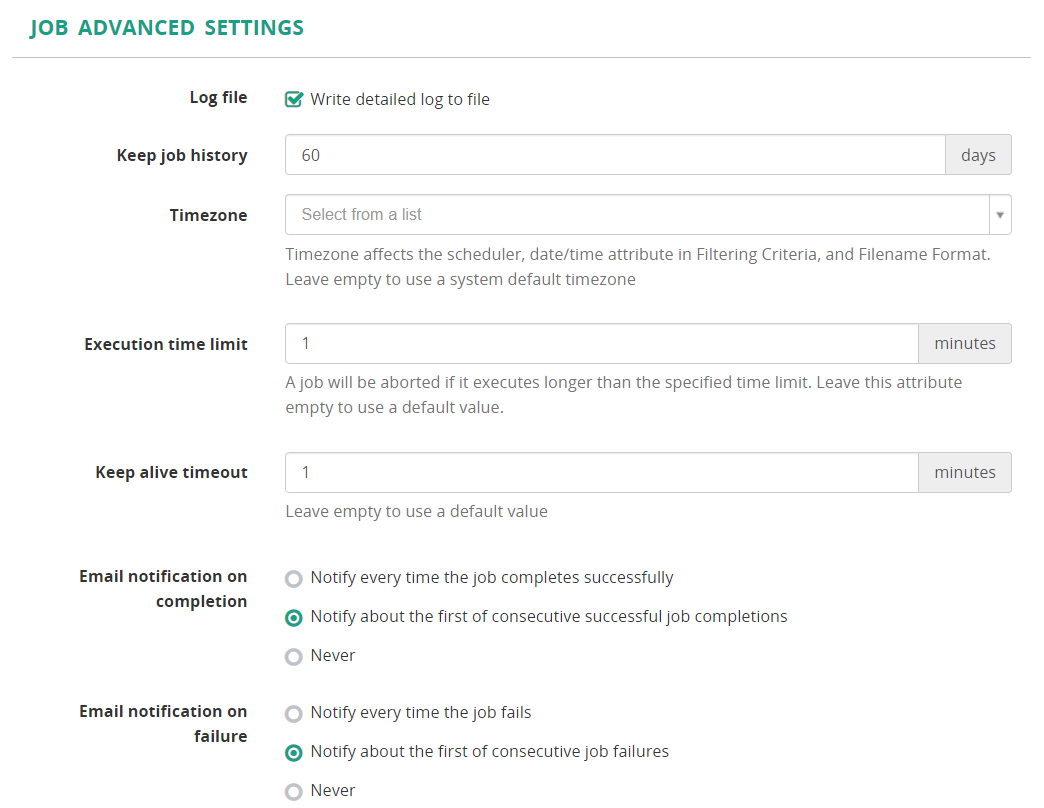
- Log file - select this check box to write a detailed log for diagnostic purposes.
- Keep job history - specify the number of days to keep the the successful job history. Default value:
60. - Timezone - allows you to change the timezone of a scheduled job. Timezone affects the scheduler, date/time attribute in Filtering Criteria, and Filename Format. Leave this attribute empty to use a system default timezone.
- Execution time limit - a job will be aborted if it executes longer than the specified time limit (in minutes). Leave this attribute empty to use a default value. Default value:
<not defined>. - Keep alive timeout - specify a timeout (in minutes) to terminate the job. Leave this attribute empty to use a default value. Default value:
15. - Email notification on completion - activates the notification by email about successful job execution. You can trigger the email notification either every time the job completes successfully or for the first of any consecutive completion message.
- Email notification on failure - activates the notification by email about failed job execution. You can trigger the email notification either every time the job failes or for the first of any consecutive failure message.
- Email notification address - specify the email address for notifications. Use a comma to separate multiple email addresses.
Info
Note, it is necessary to configure "Web portal URL" under Administration -> System -> Advanced Settings, otherwise the URL links to job details in the email will be invalid. Also, make sure the email integration is enabled under Administration > System > Email Integration.
Schedule
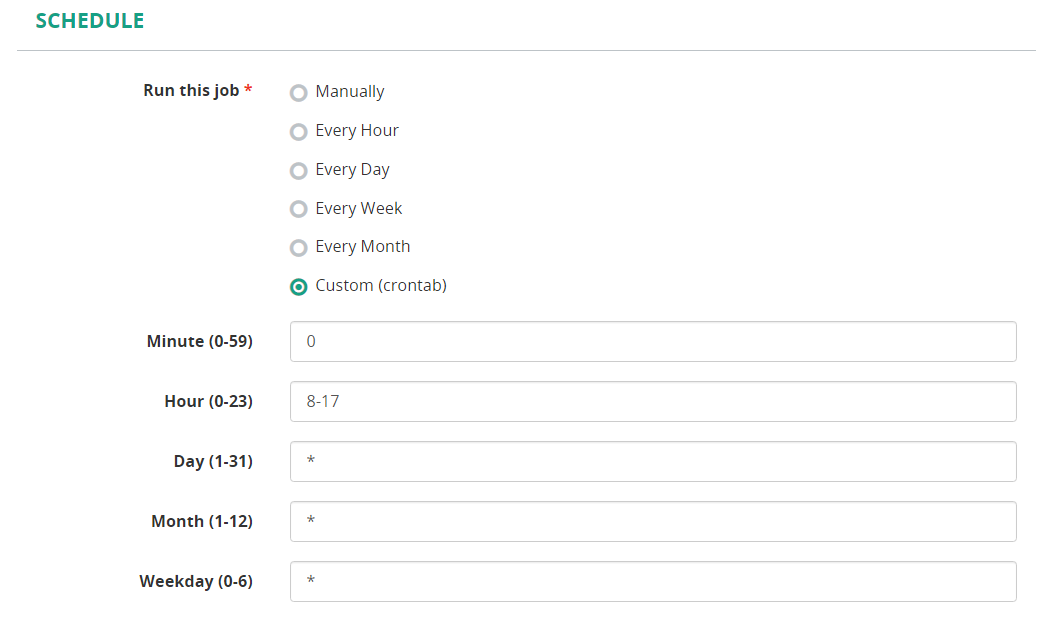
The job may be started manually or automatically by schedule. The schedule may be configured to run the job every hour/day/week/month. Also, you can set up a custom interval by selecting the Custom (crontab) option.
Please check some examples, on configuring a custom interval:
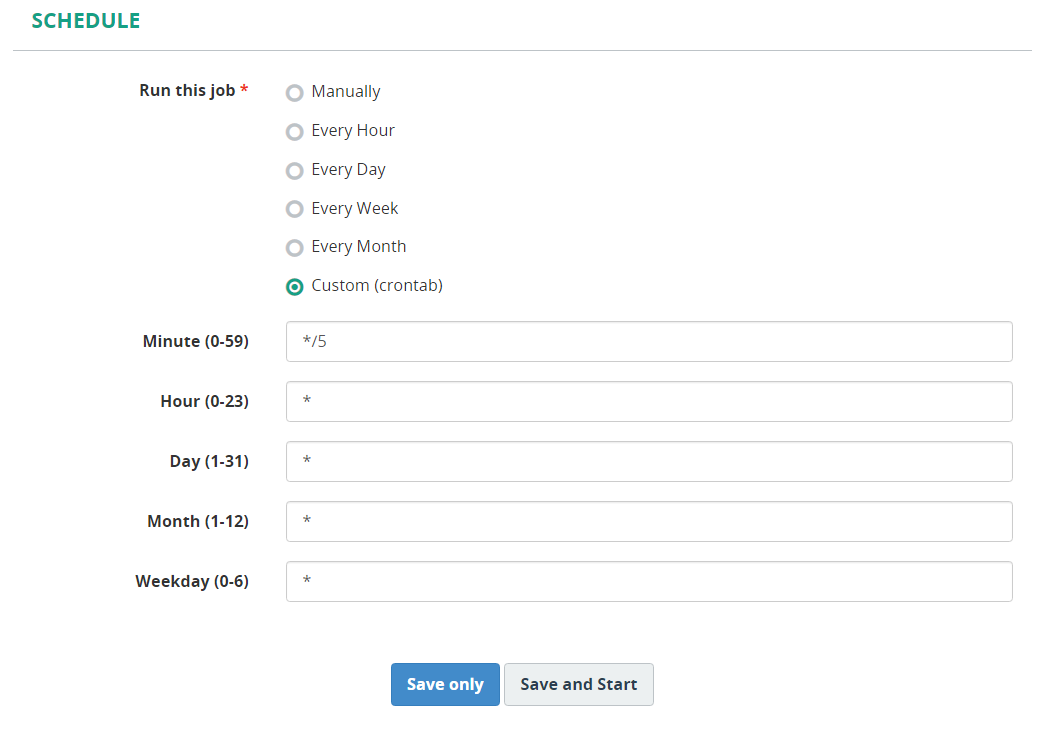
- Run the job every 5 minutes.
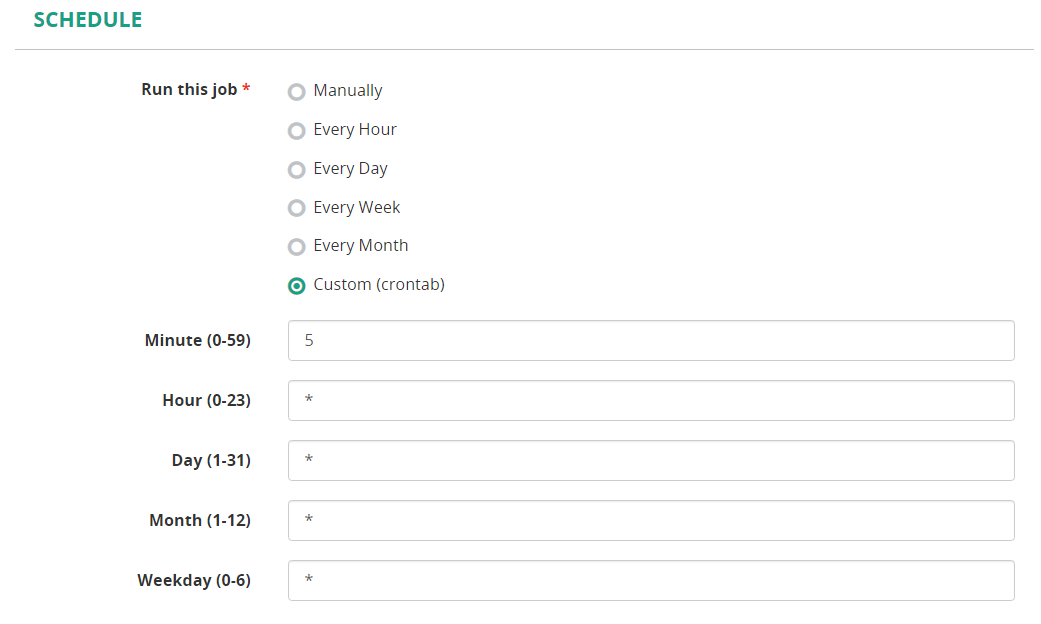
- Run the job on 5-th minute of every hour (i.e. 00:05; 01:05; 02:05 and so on).
- Run the job on 15-th and 45-th minute of every hour (i.e. 00:15; 00:45; 01:15, 01:45 and so on).
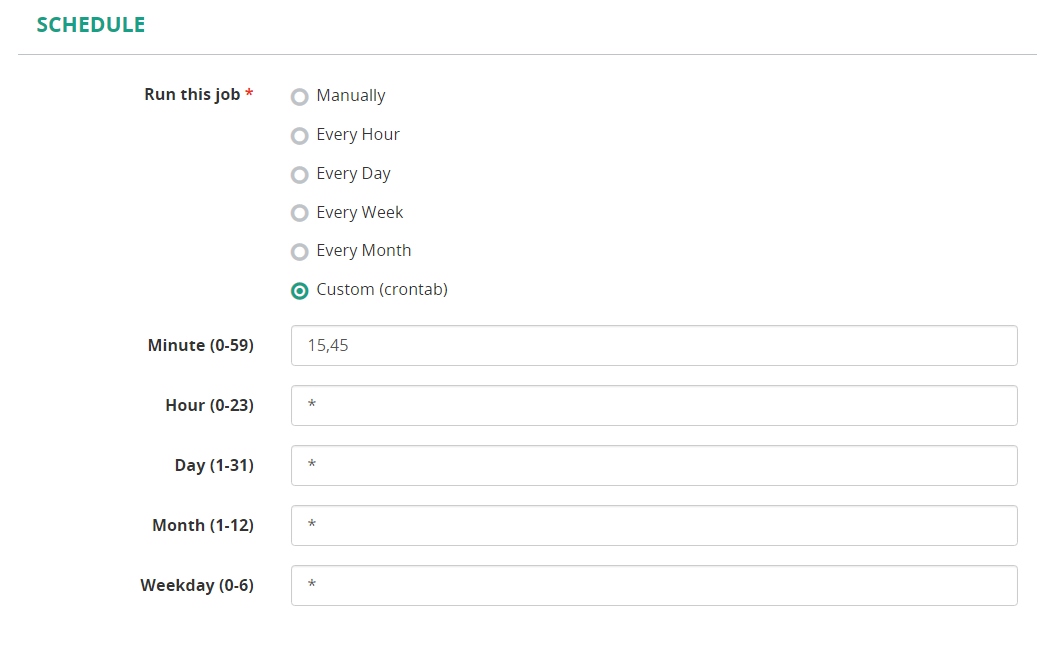
- Run the job every hour, on the hour, from 8 AM through 5 PM.
